
Sales, Purchases, and Retail Store Management Software: Al-Badr Sales Software:
This video provides a quick overview of the sales and purchases software, showcasing the key functions associated with the software’s buttons and explaining the purpose and benefit of each button. This will give you a clear understanding of the overall objective of the sales and purchases software. Detailed explanations of each function and how to perform them will be provided in subsequent videos.
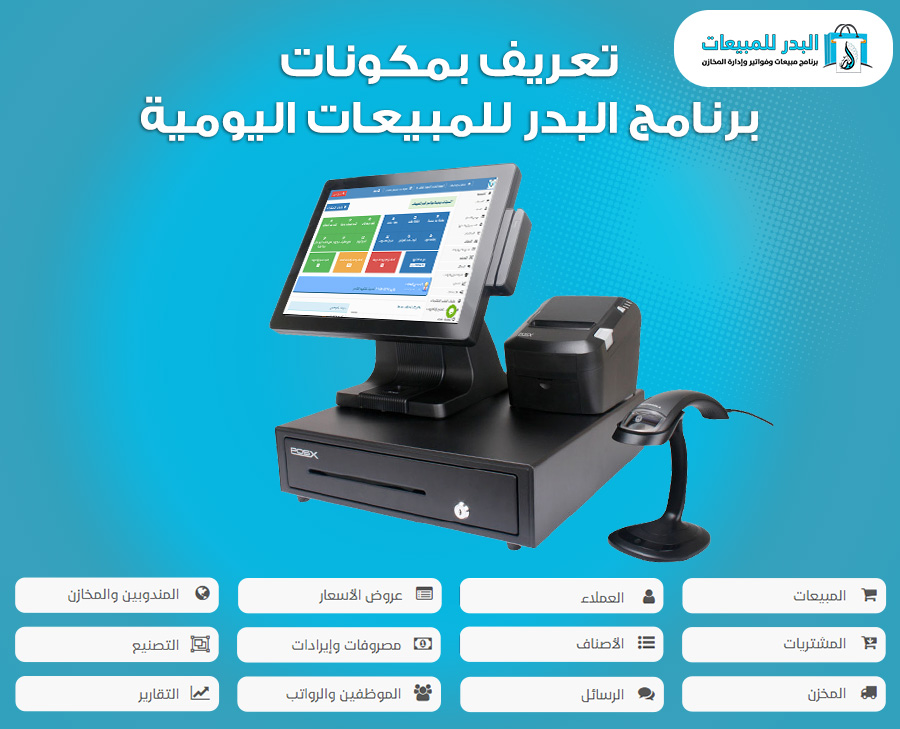
Sales and Purchasing Program Al-Badr Program for daily sales and store management, briefly and reviewing its components and functions
This video summarizes the most important points.
The side menu includes some buttons, each of which represents a specific function. We will review these functions together: –
Homepage:
Contains shortcuts for the most important functions within the program, similar to a familiar shortcut system, to facilitate our clients in performing various program functions such as creating a new sale, adding a customer, and obtaining important reports like the cash drawer, notifications, profits, and expenses.
Dear valued customer, please note that not all of these options are available when using the version for the first time. To activate them, please contact our technical support for assistance.
Sales:
This section is categorized under several buttons, including:
Point of Sale: From here, you can perform sales transactions within the program.
Daily Drawer: Here you can review the daily drawer total and see the cash collected from today’s sales.
Redeem Points: This is where you can redeem points accumulated by customers as a result of purchasing items that you have enabled the points system for. You can do this by providing them with a discount on the products they buy from your store, equivalent to the value of these points.
Game Registration: Here you can register games. Games have a different system compared to other items, as the same product can be rented out multiple times. The profit is calculated after deducting the related expenses, unlike items that rely on a purchase price from a supplier and a selling price to a customer, where the profit is calculated by subtracting the two prices.
Return Invoice:
From here, you can record a return invoice for merchandise from a customer who has purchased it from your store and wants to return it for any reason. The purpose of this is to re-enter the merchandise into your inventory and remove its value from your cash register to ensure accurate store accounts.
Today’s Return Invoices:
Here, you can view return invoices for any specific day you choose to monitor and review these returns.
Today’s Sales:
Here, you can take a look at the sales transactions that occurred on a specific day or the current day. You can also generate a report that includes revenues, expenses, total sales at both the selling and purchasing price, gross profit, net profit, refunds, returns, as well as purchases from customers and suppliers.
Search:
Here, you can search for any invoice issued in your store by using multiple search filters such as date, customer data, invoice number, or item.
Customers:
From here, you can:
Customers
Add a new customer to your store with the ability to record their data in your store’s database and conduct financial transactions with them. You can view their account statements, edit their information, or delete them from your program.
Customer Groups
Create groups for your customers, where each group includes customers with similar characteristics, such as wholesale, semi-wholesale, retail customers, or customers from different regions like coastal or inland customers. You can then define a specific type of transaction for each group that differs from the others. Additionally, when adding a new customer, you can specify which group they belong to.
Customer Debt Scheduling
Schedule customer debts and transfer installments to the following months if customers are unable to pay your store for overdue debts or installments.
Receipt of Payment
Issue a cash receipt to customers when they pay their debts or the price of overdue merchandise. This provides them with proof of payment and also serves as proof of payment for you, showing the cash in your cash drawer.
Cash Payment Voucher
Issue a cash payment voucher to any customer or individual who receives any amount from the store, whether it’s a debt owed to the store or expenses.
Recording a Zero Balance
Record damaged, spoiled, or goods that were sold on credit and for which you cannot collect the price for any reason. The program will then write off the balance from your store’s accounts so that there are no pending accounts.
Price Quotes:
Here you can find:
New Quote: This is where you can create a purchase invoice for a customer, listing the prices of specific products they inquire about. This invoice does not affect your store’s inventory as it’s merely a quote or estimate for the product prices. Such quotes are common in electronics stores, bookstores, and any other store that can provide invoices to list product prices.
Price Quotes: Here you can view all the price quotes generated from your store, whether for today or any other day.
Sales Representatives and Warehouses:
Here, you can find:
Representative View: This section allows you to view all sales representatives associated with your store. You can see the username or cashier associated with each representative, as each representative is considered a mobile sales point or a warehouse with a moving quantity of goods. Therefore, they are considered the cashier for these goods and have their own username and password. Here, you will find the person’s name, their username, and the region. You can modify this data.
Representative Locations and Movements: This section allows you to view all representatives and their assigned regions, as well as the individual movement routes of each representative. You can select the desired date to view the representative’s movements.
Warehouses: Here, you can view all representatives represented by warehouses or the mobile goods they carry, as each representative is considered a mobile warehouse as mentioned earlier. You can also update the items they have after updating the database of these warehouses, or in other words, record sales made outside the store to customers in the program’s database to show how much was sold and how many items remain.
Transfer Between Warehouses: This section allows us to transfer any quantity of goods from one warehouse to another, specifying the quantity transferred and stating the current quantity.
Excel-Based Transfer Between Warehouses: Here, we can perform the previous transfer between warehouses using an Excel file. This simplifies the transfer process instead of specifying items one by one, the quantity transferred, and the warehouse being transferred from to the warehouse being transferred to. All of this can be done by uploading an Excel file containing this data.
View Disbursement Orders: Here, you can view all disbursement orders for goods that have been issued to representatives, specifying the warehouse from which the disbursement was made and also defining a time period during which disbursement orders will be displayed.
Purchases:
Here, you can:
Add Purchases: From here, you can add new purchases from suppliers to your store. This involves specifying the item to be purchased, the purchase date, the supplier, and entering other required data such as quantity and price.
View Purchases: Here you can view all purchases for your store by searching using the supply invoice number, searching for purchases from a specific supplier or all suppliers, or searching by supply date to display purchases made on that date.
Suppliers: Here you can view all suppliers registered in your store along with their details (company name, phone number, balance, making transfers between the store and the supplier to settle debts for both parties, viewing a statement showing returned supplies to the supplier, modifying supplier data, deleting the supplier) along with a statement of the store’s debt to all suppliers and knowing how much the store owes these suppliers.
Supplier Debt Schedule: Here you can schedule supplier debts. If you are late in paying an installment to a supplier, you can postpone it to the following month. You can also view all paid or overdue installments, or all of them, for one supplier or all suppliers.
Add Supplier: Here you can add a new supplier to your store with complete data such as address, phones, balance, and tax number.
Record Purchase Return: Here you can record a supply return to the supplier if you want to return a product to a supplier you purchased it from due to its inefficiency or non-compliance with specifications or any other reason.
View Purchase Returns: Here you can view purchase returns and supplies that you have returned to suppliers on any day you specify.
Payment Receipt: From here, you can issue a payment receipt to any supplier if you pay for a product or pay part of the debt that the supplier has on the store, specifying the amount. The program will give you the supplier’s balance and specify the payment dates and the cash register from which the payment was made. The program will calculate the new balance for you after paying the remaining amount in order to record the details of this payment receipt.
Receipt of Receipt: From here, you can record a receipt of a cash receipt from a supplier due to a returned product or for any other reason, specifying its balance before and after, as well as the cash register in which the amount was deposited and the date as well.
Items:
Here you can:
Add an Item: From here, you can add items to your store by entering all the item’s details such as purchase price, selling price, discount, barcode, quantity, category, etc.
View Items: Here, you can view all items registered in your store by searching for them all or by filtering the search to display results for a specific supplier, category, or warehouse. You can also view a group of products based on a specific color or size, which is suitable for stores dealing with products with different colors and sizes.
Print Barcode Label: From here, you can print barcode labels for your products.
Low Stock Report: Here, you can view a report showing all products that are running low so that you can supply a new quantity before they are completely out of stock.
Units: Here, you can add units to define your products in the program’s database according to your business type, such as kilograms, grams, cartons, pieces, etc.
Category: Here, you can add categories under which your products will be classified, such as meat, fish, dairy, and pastries categories in a supermarket.
Excel Edit: From here, you can edit your items and products in the store by uploading an Excel file containing the quantities, prices, and new changes you want, instead of editing the items one by one, in order to facilitate the editing process and save time and effort.
Category Offers: From here, you can create offers on specific categories. For example, if there is an offer on the men’s pants category, when you buy 3 pieces, you can get them for 250 instead of 350 for a limited time. This is usually done during sales seasons, holidays, and special occasions.
Item Add-ons: This feature only appears if you specify your business as a restaurant and it means the add-ons that you specify for some dishes, such as adding ketchup, salads, and Pepsi, which you define as an add-on to the main dishes at a certain price.
Colors: Here, you can add colors to define your products, especially if your business deals with products that have different colors, such as clothing and shoe stores where a single product can have more than one color. Therefore, you can define the colors here, which will help you later in defining your products in more detail.
Sizes: The same idea as colors, but with different sizes, as you can add more than one size to define your products.
Print Item Images: From here, you can print all the images of the products you have in the store with the price of each product, in case you want to create promotions such as distributing posters and stickers for your products.
Excel Item Edit: From here, you can edit the items and their data, and you can choose one item at a time (add an item, modify quantity, modify selling price, modify purchase price).
Add Sub-Units to Items via Excel: From here, you can add units to define your products and items via Excel instead of manual entry.
Add Customers/Suppliers via Excel: From here, you can add suppliers and customers with all the previously mentioned data using an Excel file to facilitate the addition processsales.
Expenses and Income:
You can find the following here:
Record Expenses: From here, you can record your daily business expenses so that they can be deducted from the day’s income or total daily profit to give you your net profit.
Expense Item: From here, you can add items and categories for these expenses, which will appear under their respective names, such as rent, water bill, or electricity bill, so that it is clear which expense falls under each category sales.
Add Income Item: This works the same as the expense item, but for income. Here, you can add names for the income that comes into your store, such as rental income from a shop, car, or apartment, or any other income you want to add to your store’s cash register.
Record Income: From here, you can add any income that enters your store under any category, just as we did with expenses.
Manufacturing:
Here, you can find:
Manufacturing Processes: Here, we can display manufacturing processes after specifying the product, manufacturing order, and time period. This will show us all manufacturing operations within that specific time frame. Manufacturing, in simpler terms, involves taking raw materials and transforming them into finished products. For instance, restaurants use food ingredients to create various dishes.
New Manufacturing Process: From this point, we can define manufacturing order processes. We specify the product and the quantity that can be produced from it, along with the ability to view the raw materials used in the manufacturing process.
Manufacturing Definition: Here, we can define the manufacturing process. For example, we can take a specific dish from a restaurant and list the quantities of raw materials used to prepare it. If we take a hamburger sandwich, for instance, we can specify that it consists of a beef patty, two slices of tomato, lettuce, onion rings, and so on. We can then define the quantity of each ingredient used, such as half a can of ground beef and a quarter of a bundle of lettuce.
Messages:
From here, you can benefit from the text messaging service, which you can send to your customers containing the latest offers and discounts to increase your business activity and attract more customers.
Employees and salaries:
Here we can find:
List of employees: From here we can add a new employee with his various data, such as his name, job, telephone, salary, and advances he took, with the possibility of deleting him or modifying his data. All employees can be displayed, or only working or non-working employees. Employee affairs can be managed here by disbursing their salaries, specifying the deductions that are supposed to be deducted, determining the salary disbursement treasury, and other details, as in the following image:
Manufacturing: Payroll: From here, you can process employee salaries by specifying the month, year, and treasury from which the payment is made. Deductions and advances can also be defined and subtracted from the total to get the net amount. Any desired notes can be recorded, and then this data is saved in the program’s database.
Recording Advances, Bonuses, and Deductions: Here, you can add advances, bonuses, and deductions for any employee, specifying the amount, reason, and notes. This information is saved in the employee’s file to be added to or deducted from their salary at the end of the month.
Employee Notifications: From here, you can create notifications for employees that appear on the main screen to emphasize certain requirements. For example, you can remind an accountant to collect a cash payment from a customer, prevent sales to a specific customer, or impose overtime for the day.
Weekly Attendance: Here, you can record employee attendance throughout the week. This is like an attendance register that you can review at the end of the week. You have two options: mark an employee as present or absent for weekly performance evaluation. You will find a summary of each employee’s attendance for the entire week next to their name.
Reports: Here, you will find a collection of the most important reports that provide you with detailed information about your business activities over specified time period ssales . No small or big detail is overlooked; you will be informed about everything, as shown in the following images.
All you have to do is click on the report you want and it will give you the data you need in moments that do not exceed the number of fingers on one hand.
Settings:
Here, you can find:
Bill Additions: This is where you can add charges that you may need to apply to your products, such as Value Added Tax (VAT), service charges, and other similar additions.
Variable Price Lists: This allows you to create variable price lists, which are for items that don’t have a fixed price but instead have a price that fluctuates according to market rates. Examples include metals like iron, which have a new global price every day, as well as other materials like paints, gold, cement, and construction materials.
Users: Here, you can create user accounts for your store or for those who will be using the cash register. You can also customize the permissions for each user based on their job and responsibilities.
Cash Registers/Points of Sale: This is where you can add a new cash register or drawer and view all the cash drawers in your store. You can also transfer funds between cash registers, modify data, or delete a cash drawer.
Company Information: Here, you can view and modify your company information, such as your logo, business activity, and tax ID number. This information will appear at the top and bottom of your invoices.
Customer Price Lists: This allows you to create different price lists for different customer groups, such as wholesale customers, retail customers, or specific customer segments.
Define Areas: This feature lets you add areas to your program and locate them on Google Maps sales.
Program Settings: Here, you can customize the program to suit your specific business needs. You can enable or disable various features based on your requirements sales.
Barcode: This section allows you to configure barcode settings, such as length, width, height, and other options as shown in the image below.
You will configure the barcode and its sizes, as well as margins, activate the barcode scale, and everything related to that from here.
E-store Settings:
Your e-store is your online storefront, exclusively designed for Al-Badr Company customers who are subscribed to the Al-Badr Online Sales program. Each online account is linked to an e-store, automatically displaying the products available in your physical store once you mark them for online visibility.
Your e-store offers a versatile platform, featuring multiple categories and products, along with special offers, discounts, and a showcase of your most popular items. It enables convenient electronic payment options, including credit cards, and facilitates product shipping. In essence, it’s your second store, but online.
From here you can find:
Design: From here you can choose the shape and design of the store that suits you from more than one design sales.
Slideshow: Here, you can add slider images that will appear on your store’s homepage, showcasing your business activities. You can link these images to specific pages, allowing users to navigate to them with a simple click sales.
Online Store Orders: From this section, you can track your customers’ online orders, process them, ship them, and determine their status (completed, in transit, etc.).
Site and App Order Settings: Here, you can define and configure your online store’s settings, such as shipping fees, maximum shipping fees, minimum order value, shipping fee type (flat rate or percentage), maximum shipping fee value, maximum number of cards allowed for sale, and inventory items.
Static Pages Settings: Here, you can add static pages to your site that contain important information like terms, notices, store policies, and terms of service. These pages will appear at the bottom of your site for customer reference.
Social Media Accounts: Here, you can add your social media accounts. When customers click on the corresponding icons in your store, they will be directed to your social media profiles.
Product Discounts: From this section, you can create discounts and offers on your products, such as seasonal sales or holiday promotions. Featured products with discounts will be displayed.
Discount Coupons: Here, you can add discount coupons. When a customer completes their purchase and proceeds to checkout, they will be prompted to enter a coupon code if they have one. The discount value will then be applied to their total.
Display Contact Information: Here, you can enter your business information, including name, address, email, and a brief description. This information will be displayed on the homepage. You can also select a banner image for your store and find the direct link to your online store.
Online Payment Settings: After contacting a payment gateway provider, you can configure your online store’s payment settings here by entering the provided credentials. This will enable online payments in your store.
Log out: To log out of the account.
Send notes: This is to send any notes related to the program to the company’s support team to try to solve it for you and help you implement any modifications or clarify any inquiries sales.
Tutorial explanation: From here you can review the program’s educational lessons to explain how to use the program.
Support code: This code is the number for your program or account, through which the support team will be able to reach you and get to know you. Therefore, when you want to communicate with technical support, it is preferable that you save the code and inform him of it so that he can get to know your account and program.
